Leaderboard

Popular Content
Showing content with the highest reputation on 12/26/21 in all areas
-
MDV: Director's Cut: Director's Cut Teaser Poster
DragonPixel and 5 others reacted to Cryptic Runner for a topic
after a looooooooong time, i've started working on an ambitious animation project which will definitely raise the bar for MI animations to come, featuring epic action moments, epic action moments, epic action moments, 80's music, humor and An Engaging Storyline. here is a teaser of it which features a vague acronym for the name! featuring @Cryptic Runner @9redwoods @DragonPixel @Phyre @MikTRF @belmo @Floofy @Frost @Jake_28 @Jnick ...see you in Lorse Vaygice ; )6 points -
no, it's not my birthday, it's her birthday. just testing my female character model. release? maybe.4 points
-

Spider-Man In Minecraft
CanadianLunaPogi and 2 others reacted to RNUB for a topic
Baldeve (@baldeve_world) / Twitter3 points -
My grand return, and subsequent disappearance.2 points
-

recent posts page been lackin lately, miss seeing it booming with crazy creations
Cryptic Runner and one other reacted to Benji for a status update
recent posts page been lackin lately, miss seeing it booming with crazy creations2 points -

Mineimator Violet 1.1.0 (base on 1.2.9.2)
Fover reacted to Excitablecell for a topic
Version 1.1.0: Fix bug: diffuse reflection can't reflect colorful light Fix bug: import from world do not support the grass path we also fix other bugs in different parts, but I forgot their details. Version 1.0.6: Now Violet can select the correct language file automatically Fix bug: Sometimes mouth-animator can't convert audio file into texture mouth model and curve mouth model Fixed the problem of camera contrast Version 1.0.5: Base on Mineimator 1.2.9.2 Version 1.0.4: Base on Mineimator 1.2.9.1 (support minecraft 1.18) Add diffuse reflection to the piont light and spot light Completely fix the bug of bezier curve(graph editor) Increased the upper and lower limits of volume fog Mouth animator supports exporting animation to blockbench Welcome to Mineimator Violet! I am Excai, an amateur animator and programmer Thanks to my friends, we have completed an exciting mineimator modding Now let me introduce you to violet! Post progressing update: You can moderate the color temperature of your renders now. This new property can be found in ‘Camera-Color correction’. We also improved the brightness algorithm in the "color correction" of camera settings. Fog update: We added two types of fog in Mine-imator Violet, height fog and volume fog. Both of them give your animations/pictures an entirely new look. More importantly, they do not require expensive hardware or devices to use. Enjoy Mine-imating with them! Height fog: Volume fog: Control FOV by camera length: To handle some camera effects like Dolly Zoom correctly, we add a checkbox under the Field of View in the Camera tab. When activated, "Field of view" will turn into "Camera length". Now you can control your lens width smoothly! Bezier ease curve: We introduce the Bezier curve to you in Mine-imator Violet! Using the Bezier curve could make our animation more controllable and fluent. You can find it in ‘frame editor - Keyframe’, where you chose ease curve before. Mouth animator: Confused about making mouth animation? Our mouth animator will handle this hard-nut for you! By using this mouth animator, you can get a correct mouth animation that varies in the mouth model. Whatever your mouthes are, the mouth animator could generate animation based on the sound provided by you. You can find it on the toolbar, which looks like a lip plus. Model importer: We always dreamed of importing some excellent models from Minecraft mods easily. Now the dream come true! You can import models from particular Resource packs and Minecraft mods into Mine-imator now, only in the Violet version. Night theme: Used to be a night owl? We provide an auto-changing night theme. Take care of your precious eyes. :-) Startup acceleration: Violet version has reduced the software startup time by 50%. Multiple resources import: Violet supports importing multiple texture files at once Contact us: If you have any questions, please contact us in the forum or youtube Fourm ID:Excitablecell,Stanwade,ttrtty5,ChennyWang0311 YOUTUBE Authors: @Excitablecell @Catrina @Stanwade @ttrtty5 @ChennyWang0311 @raw_chicken1 point -

The H4ppiP33p Rig Pack
Kaos_Kinetic reacted to JaystepherMLG for a topic
The long and awaited H4ppiP33p Rig pack is now out for download! A tutorial will be coming soon to show you guy how to use the rigs, Anyway I hope you guys enjoy it And I'll be posting updates to the rig pack like new models in the future :3 Update: 2022/05/19 no new models but we have a new image of the models! huge thanks to @H4ppiP33p for making it Update: 2022/05/12 Added 4 new models! Tiny H4ppiP33p Mini H4ppiP33p H4ppiP33p (Blocky Bends) H4ppiP33p (Classic) Fixed some issues with the models All of the rigs are now MIOBJECT Update: 2022/01/21 Added a new model: The H4ppiP33p (Candle Costume) model! Fixed a few bugs with some of the models Update: 2022/01/20 Removed H4ppiP33p (Hoodie) and is replaced with the model H4pp1P33p with Hoodie (performance) since the crash can't be fixed All of the rigs are now MIPROJECT instead of MIOBJECT, Just in case H4pp1P33p with Hoodie (performance) model take up 75% less FPS while animating, so that should not be an issue for people who have low end computers Update: 2022/01/07 Fixed H4ppiP33p (Hoodie) miobject that failed to load into Mine-Imator (Thanks to H4ppiP33p for testing the rigs out :D) Added more facial expressions: Dizzy, Dead, Tears, etc. Fixed the mouths on the H4ppiP33p (Skeleton) rig Fixed the Normal Eyes on All of the rigs 2022/05/12 Download Link: https://drive.google.com/file/d/1phZ10kpMgTB1nISUVV5VCtEFVgTr3smN/view?usp=sharing1 point -
Yup, I know what I said, but I thought I needed to make something better for this wonderful place, so I asked my Mom If I could work on my Laptop for a sec and made this. It crashed multiple times and didn't render a few times, but it worked at the end! Now, for this year, this is the last render from me! A Holy Joly Christmas to you all and a Happy new Year! Big Respect to @FOXY TOONS for his Christmas Tree Rig! It is so awesome and detailed and I loved using it, I even used some parts just so, because it was way to awesome, here is the rig if someone would like to use it!1 point
-

[Mine-Imator] Merry Christmas!
Duowithng reacted to X-ZaneZ9-X for a topic
1 point -

30 Mine-Imator 2.0 Features Update Part 04?
kokurokun reacted to LacaMenDRY for a topic
Cursor Zoom in and Out. When Zooming on the Viewport, It's better when it have an Option to Zoom on the Mouse Cursor for the main Directions. So Whenever the Mouse Cursor is in the Viewport Screen, It only Zoom in or Out just on the Mouse Cursor. Manual Insert Keyframes. An Option to be able to Manually insert keyframes when needed, Not Auto Inserted Keyframes. Shift for Slower Actions. Such as Rotating, Grabbing, Scaling an Object with Shift + (etc), The Action will became Slower for more Accuracy Valuing. Snapped Object Navigation. In Viewport, We can Snapped an Object Navigation to one of the XYZ's Axis By Holding the Middle Mouse Button, Just like in Blender. In Program Assets. The ability to store all the imported Assets such as Textures, Mimodels, Miobjects, etc in Mine-Imator Assets Tab, Without needing to open a File Explorer to import one by one Assets. Snapped Viewport View. An Ability to Snap the Viewports view to Front-Side-Top-Bottom View by clicking the one of the Numpad Buttons. Auto Focus On Selected Objects. When in Viewports are full with bunch of Object, Scenery, etc. To Faster Focus on the Selected Objects can be done by Pressing the Shortcut key to Change the Viewport Views into Zoom In, And the Selected Objects are now Seenable, and ready to play with. X Rays. In Viewport, We can turn on the X Rays Render Mode to Faster Working, And Also X Rays that can became Render Mode so we can Render a Videos, or Images with X Rays turned On. 3D XYZ Axis. In Viewport it has a blank Flat Greeny World with no XYZ's Axis on the view, So maybe it's better to add an XYZ's Axis Guide for Easier Work when in Example When Scaling an Objects that have no Axis Guide Accept those Colored Lines, With XYZ Axis Guide, It can be Easier for Humans to Identify wich Directions the Scale would be. Objects Snapped Navigations. Snapped Object Navigations By these Following Examples: G+X= For Grabbing on X Axis. R+Y= For Rotating on Y Axis. S=Z= For Scaling on Z Axis. Advanced Custom Light Source. The Ability to custom a light source brightness such as a spotlight, or point light just like Sun light source did in Mine-Imator. Animate Parenting Keyframes. Ability to Animate Parenting Properties,. Parenting Shortcuts. Parenting an Object just with Ctrl+P Shortcuts, So no need to go onto the Properties Tab, or the Timeline Tabs Anymore. Just with Shortcuts. High Quality Render mode shortcuts. Ctrl+R for High Quality Rendering Mode. Viewport Grid Options. In Mine-Imator Viewport, We will see the Default Greeny Flatland World without Grid like pattern, So If there an option to Enable the Grid, it will be Easier to Navigate something, Just like Number 9. Glow Animations. Ability to Animate the Glow Values. Glass Blocks, And Transparent Object. In Recent MI, The Light cannot passes Through the Glass Blocks, Or Transparent Objects like, Fixing this Issues can causing the Transparent object like will let Light passes Through it. Fullscreen mode. Pressing the F11 for Example to enable the Fullscreen mode for Mine-Imator, So Users can More Focus on the Projects, And Also can just grabbed the Imported Assets from the Assets Tab into the Viewport. 3D Sound in the Viewport. When Importing a .mp3 formats to the scene, It will became 3D, So the Far away the Camera is, The Smaller Sound it will gets. See what I mean? 3D Sound Effects on the Viewport same as the Camera. Small Reflections, Or Graphic update on the Materials. In Mine-Imator, Everything seems Mate, and doesn't really have that Unique Materials Accept the Textures, So By adding the small Reflections, MI will become more Fluid, Or More Advance Looking Software. Also can make the Graphics 15% Better by Adding these Reflections Method that I just Invented inside Mine-Imator it self: If I can make it work just with Practical Methods, So why It can't Be Implemented in Mine-Imator with Coding Right? But All of this will back on the Development Team Choices. Mine-Imator GPU. MI Have Access to Graphics Proccessing Unit, A.K.A GPU Usage for more faster Perfomance. Advanced Water Graphics. Water Graphics in Recent MI Versions is just a Transparent Animated Textured Surface, Adding a Depth just like KeepOnChucking Water RIG, can Make Water in MI more Realistic than Before. A Way more more more Realistic If it has Small Reflections like Number 20. Advanced Mine-Imator Theme Customizations. If Modelbench have it, Then I sure in the Next Mine-Imator, A.K.A Mine-Imator 2.0 will have this Features too, But what I mean is not just the Color Customization, But Also the Logos, Or The Viewports Grid will be Enabled... I hope You all Understand what I means :v. Outlined Graphics Mode. When Outlined Graphics Mode On, The Final Render will make the Scene looks more Cartoony, Perfect for Cartoony Render Style, How it works? Just look at Nowdays Mine-Imator. If We Selected an objects, The Objects will have the Highlines White Color on the Edges of the Objects, So maybe this can also became the Cartoony Graphics like. I hope again my Explanations not Make you guys Confuse. Advanced New UI for Particle Editor. In MI, When we open up the Particle Editor, Our Head will start gettin Sick because of the UI is So Complicated. By Updating the Particle Editor UI's it will make users have less Headache when playing with the Particle Editor, Also can sleep well at night. Advanced AA. In Mine-Imator, Even if we Rendered an Image, or a Videos with 4K Resolution, It always have that little Jagged Edges line on the Image, So Advanced Anti-Aliasing will make the Images looks more Smoother without those Jagged Sharp Edges on the Scene. Fullscreen Tab. When wanna mess around with the timelines for example, Just click Ctrl+F, or etc to Enable the Fullscreen Just with the Timeline tab without need to Drag it up for Larger Timeline tab. Camera can see Through a Surface Infront of it. In Mine-Imator Settings, It have the See through Surface, Not very helpful on the Majority of the Users, But Very Helpful for me to Keep Inventing the Reflections Machine RIG, Without Need to make a Duplicate of it wich is really Time Consuming, And Also A Perfomance Consuming. Long Range Shadows. This one is the most Problematic for those who are Working on a Big Landscape, Or Bigger Environment Scene. The Shadows Range in MI is still Limited, When it Long Range, the Minus is we will get the Lower Resolution of Shadows, But when The Resolution is High Qualtiy, In this Time The Shadows it self is not Long Range Anymore, Hope it can be Fixed, It depends Also on the GameMaker Engine I guess... Last but not Least is the LOD's. Mine-Imator Will so much Laggy when somethin Gigantic Size of Objects is On the Viewports, So to fix this, MI needs the Level of Details Feature to Avoid the Laggy Problems. Remember! All of this Is just an Idea that Are in my Brain, So Just picked fews of it If Possible. I feel sorry if My Explanations is very Confusing if in case... It's because My English Skills is not very Pro Enough, So Have a seat to Understand it... And Also I didn't give the Image on this Topics, is because I was in Rush Hour, Sorry about that. @Nimi @Voxy I hope this can be helpful sir. I just helpin... ?.1 point -
Credit to @anima cryses for the model1 point
-
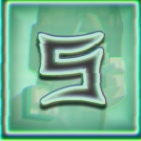
YM's Minecraft Letters Model
Green Z studios reacted to ShinyGHASTTear for a topic
just doing something before sleep v:1 point -
Hello people, I want to give you my pack of items for an apartment, namely: for a bathroom, kitchen, bathroom in this pack about 40-44 models that would not strongly slow the project, I turned off the visibility of objects called "Mirror" and "MiniMirror", which are at the very bottom of the timeline, just go to the tab "keyframe" and tick off at the point of the visible For convenience I divided into two archives in one archive with the name "models separately", where there are separate models in different folders in another archive called "All Project andems of the apartment" there is a project with all models at once (as in the screenshot below) (I do not recommend to touch the folder with the name "." and the lock icon) hell, I almost forgot the link models separately https://vk.com/doc182866464_451320201 All Project andems of the apartment https://vk.com/doc182866464_451320195 Mediafire - All project http://www.mediafire.com/file/zjgefopdfepl65r/All_project_items_of_apartment.zip Models separately http://www.mediafire.com/file/7m3oz9dgmo1fdqc/models_separately.zip if the links do not work, please tell me1 point
-
When you save your project in Mine-imator, a folder is created with the animation name, which contains the .miproject (Mine-imator project) file of your animation together with any skins/textures/scenery you used. This makes sharing animations simple, as everything is located in one place. You can usually find this folder where you installed Mine-imator, inside the Projects folder. Note: This guide is relevant for all kinds of files, not just Mine-imator projects. Step 1: You can't upload a folder to the internet, but you can upload a compressed folder (.zip file), also known as an archive. If you only want to upload a single file, you can skip this step. To create a compressed folder on Windows, right-click the folder, select "Send to" and pick "Compressed (zipped) folder" as shown below. The newly created compressed folder will have the same name as your original folder with .zip added. Step 2: Upload the file or archived folder to a media sharing site. There are some good ones out there, I'd recommend one of these: MediaFire Google Drive Dropbox Step 3: When you have uploaded the file (this process varies from site to site), fetch the download link of your file and post it on the forums. Make sure the download works before sharing it with the world!-1 points