


Reputation Activity
-

 iFallOffStuff reacted to nanoTEK in Heroes of Cygnus
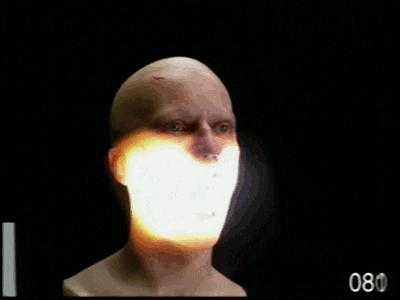
So, this took a really long time to make, even though I made it in 2 days, I would really appreciate if you let me know how to improve, because I think I've been improving since my last animations...
-
iFallOffStuff reacted to Ellisphere in Caving [Wallpaper] 4K
So, I made a wallpaper with that 3D Stone rig you may have seen if you saw my 3D Blocks topic.
This is the wallpaper.
Tadaa...
So uhh.... did you like it?
-
 iFallOffStuff got a reaction from Ellisphere in Police Car Rig WIP
This is my first vehicle rig so any advice is appreciated I'm easily willing to make changes before I release it for download.
NOTE : I will add tyres , windows and interior once I have got advice on the main frame!
It's a police car btw
-
 iFallOffStuff got a reaction from Jpman11 in Mob Meeting
Yep, it's clear you tried. Now that you've explained it to me I can see what you were going for but personally, I think your original idea was better. I know for a fact that Pharien has a table and chairs rigs and there are most likely others in the rigs section on the forums. You may want to also try going into the requests section, people often take rig requests from other people!
-
-
 iFallOffStuff got a reaction from crustyjpeg in Police Car Rig WIP
This is my first vehicle rig so any advice is appreciated I'm easily willing to make changes before I release it for download.
NOTE : I will add tyres , windows and interior once I have got advice on the main frame!
It's a police car btw
-
 iFallOffStuff got a reaction from Huzkii in Police Car Rig WIP
This is my first vehicle rig so any advice is appreciated I'm easily willing to make changes before I release it for download.
NOTE : I will add tyres , windows and interior once I have got advice on the main frame!
It's a police car btw
-
 iFallOffStuff got a reaction from -StickyMations- in Police Car Rig WIP
This is my first vehicle rig so any advice is appreciated I'm easily willing to make changes before I release it for download.
NOTE : I will add tyres , windows and interior once I have got advice on the main frame!
It's a police car btw
-
 iFallOffStuff got a reaction from Emaniplex in Police Car Rig WIP
This is my first vehicle rig so any advice is appreciated I'm easily willing to make changes before I release it for download.
NOTE : I will add tyres , windows and interior once I have got advice on the main frame!
It's a police car btw
-
iFallOffStuff reacted to PhantomRU in Black Wolf - Head, body and back leg [WIP]
W.I.P. ^^
While sculpt.
-
iFallOffStuff reacted to GbStudio in Land of Possibilities
First time I worked with lens flares. Hopefully you critics like it. You were probably expecting something else because of the title.
-
iFallOffStuff reacted to Hylanders in Bow & Arrows [Wallpaper]
Real fast, real quick!
*Slowly improving wallpapers*
Anyways, here's another thing I did
lol, I suk
-
iFallOffStuff reacted to TheAmazingAnimator in Juno: The Wallpaper
So in honor of NASA's Successful Juno mission, I have crafted (get the reference?) a Juno Wallpaper, here it is:
I will make a more advanced version too, so don't worry. This is only the first version too
-
iFallOffStuff reacted to Kaijoo in Spider-Man Swing Test
Sorry for no post yesterday,im gonna try and get one upload almost every day,unless I try and put more work into one so its like 2 days worth.
-
iFallOffStuff reacted to -StickyMations- in R-4 Sticky Rig! - No download... yet.
Hi! I finally finished rigging R-4 Sticky! Yay!
So... I made this cool gif:
So this is another of my OC's, hes like my other one, R-16 Sticky.
By now I've got 2 characters, my goal is make another 3 more...
When I finish all of them, I'll release them in a rig pack...
Psssst! one of the OC's is going to be a girl :3
-
iFallOffStuff reacted to Piegon99 in in the water
only with mineimator
female & male rig - @fishing gunseller
-
iFallOffStuff reacted to AnxiousCynic in How to do a flip
This one was requested quite a bit, so I decided to tackle it this week.
-
iFallOffStuff got a reaction from -StickyMations- in Sticky Template! [Male version] (DOWNLOAD)
Niceeee! Really easy to use!
-
iFallOffStuff reacted to -StickyMations- in Sticky Template! [Male version] (DOWNLOAD)
Hi guys! I've been inspired to do this since
I saw how my template worked so well with @Nicolasev's skin...
So now... I'll be releasing my Sticky Template!
==============================================================================================================================
Easy to use, easy to retexture and good for lip sync!
==============================================================================================================================
TUTORIALS:
How to retexture?
How to use?
==============================================================================================================================
Male version
Female version
==============================================================================================================================
Credit it's not needed but I appreciate it if you do :3
==============================================================================================================================
Funfact: you can have 21 of these in a project and it wont lag! (at least for me)
-
iFallOffStuff reacted to Artleck in Zombie Walk Cycle Presets!.
Presenting to you my zombie walk Cycle! Comes with 4 body poses for your liking.
No Credit needed, But if you do, It's much appreciated. :)
Preview:
-
iFallOffStuff reacted to J.A studio in my first animation
this my first animation
I need your opinion and your advice
-
iFallOffStuff reacted to Marten in Beautiful sunset [4k wallpaper]
A wallpaper who was made in Mine-imator and paint.NET.
-
 iFallOffStuff got a reaction from FoxyThePirate2704 in How to make face rigs ( for beginners)
I have recently become interested in face rigs, and , although I 'm not very experienced I feel like I haven't contributed an awful lot to the MI community. So here it is, face rigs for beginners! This tutorial is for those who are looking to use this guide to make their first face rig. Any questions you have comment below!
Step 1 : Finding The Right Tool
To make a face rig the first tool you need is a photo editing/paint tool. However, it can't be any paint tool... there is one requirement:
.It must save transparency, transparency allows you to load an file into MI (or any other programme for that matter) and have your chosen areas remain see through. This is essential.
Some tools you could use are:
Photoshop ( costs money, unless pirated)
Gimp ( Free and a generally useful tool)
Paint.net ( Another free and very useful tool)
Pixlr - ( Free , I have no experience with this tool , it was suggested by Tiedmes)
For this tutorial, I will be using paint.net.
Step 2: Editing the skin
Once you've got your paint tool open, you need the skin you want to edit (make sure, before you start editing, that you have a checkered grey and white background).
Select the eraser tool and edit out the eyes and the mouth, so that you can see the background through it. Once you're done , It should look like this (some people prefer a 2x2 eye size instead of the 1x2 eye size i'm using). Remember to save it! You'll need it again later!
Step 3: Loading it into MI
This is a simple step, it starts getting a bit more complicated in the next step.
.To load your rig into MI, simply spawn in a Steve ( or Alex ) into your project. Then, on the far right hand side of your mine - imator interface, you will see project properties. Click this and then click libary. Here you will see all the items in your project. Find the Steve you just spawned in and click on it, you should see a skin tab slightly below it.
. Click this, then change the skin to the file that you just edited ( the one where you erased the eyes and the mouth). You should now have a weird looking character.. something like this :
Step 4: Building
Ok, this is where it gets a bit harder... but if you follow these steps it should be easy.
You need to decide what part of the face you will edit first, I'm going to edit the eyes ; the simpler component.
The eyes contain 3 items :
.the eye whites
.the pupils
. the eyebrows
. The obvious part to start with is the eye whites, for this, I just use a cube. Load one in from the crafting table and parent it to the head. If you like a neat timeline, you might want to create a folder called something like "Rig Parts." Scale the cube down so that it covers both the eye sockets.
. Next, we'll do the pupils, like the eye whites, we'll be using a cube. Load it in, parent it like you did with the eye whites and scale it down. This time you may want to adjust it's depth as well. Once you've done one pupil you can easily duplicate it and move it other to the next eye. Great! We're almost done with the eyes.
Final part, the eyebrows! These are as simple as the eyes, and the exact same process. Eyebrows are usually about the same length as the eye sockets, you may want to take this into consideration. Like you did before, spawn in a cube and scale it down so that it is a thin rectangular shape. You may wish to angle it upwards slightly. Again, we can duplicate the one eyebrow to make two. This time however, you will need to change the rotation slightly.
And that's it! You should now have a face rig complete with move-able pupils , eyebrows and I guess.. if for whatever reason you need to move them, eye whites. .
Step 4.5: The Mouth
The mouth is ( in my opinion ) the key part to any facial rig, not only can a good mouth rig indicate who's speaking, it can also show expressions. In my mouth rig I will be having 5 components, although, after the end of this tutorial you should hopefully be able to add more so that the mouth suits your needs. My components are:
.Mouthbox
.Teeth (Lower and Upper)
.Mouth top
.Mouth Bottom
.Mouth sides (left and right)
To start the mouth rig we're going to need to go back into the editing tool you used originally and open the skin with the mouth and eyes edited out. We will have to make the areas around the mouth the same colour, so that when we build the mouth itself, we can have it blend in naturally. So pick a colour (similar to the rest of the face) and basically.. give him a beard. Just paint all around his mouth. Notice this in the picture (you may want to also make a note of the hex code so you can match the tone exactly in MI).
One you've done that, simply do as you did at the start of the tutorial. Go to libary > human > and change the skin to the file you just made.
Step 5 : Building the Mouth
To build the mouth I usually start with the lower and upper mouth. These are simply to rectangles the user can use to open and close the mouth. The size doesn't matter too much, as you can always resize it to your specific needs. The only scale value that really matters is the x, the other can be rough guesses as to how you will need it. Now, spawn in a rectangle and scale it so that it is almost the same length as the head and height value (Y or Z ) Covers about 1/8 of the mouth. Once it's been scaled match the tone of the cube, to the rest of the mouth. Next, copy it and mouth it upwards, out of sight, to form the upper mouth.
Next, I will create the mouth box?? ( The red part you see when you open your mouth). This is pretty simple : a red cube that goes inside his head to form the back of the mouth. Once you have done this step, you should no longer be able to see the background through his mouth. Most mouth insides tend to be a dark red.
Great! The mouth is really beginning to take shape, the obvious place to go from here is the teeth. So that's what I'll make next. The lower and upper teeth are usually seperate, this gives the animator more freedom when he or she is using your rig. The teeth are simply two rectangles that are tall enough so that they can meet in the middle and long enough so that they can cover the whole length of the mouth. After doing one row of teeth, you can duplicate it to make the other row. Almost done! Just one more step! The mouth looks quite square in the pictures, I'm going to show you how to fix that.
The last step is making the mouth sides, these are two skin coloured rectangles that allow your character to expand and compress his mouth. Sadly, though, it's not quite that simple. I make my sides so that the character can smile easily. To do this, I rotate the rectangle at 45 degrees and re - scale it. This can get a tiny bit hard but after this... you're done! I find it easier to spawn in another cube and parent the two together. This forms a nice diagonal line. The last step is to duplicate the rectangle and simply rotate it so that it is symmetrical on both sides. Then you're done! You're face rig will most likely look a lot better than mine as I need to go for dinner now... so I kinda rushed the end. Here's the finished product :
Also, this is my first MI tutorial so please take the time to fill out the poll and comment any advice you have! Hope you enjoyed!
If you did find this helpful , why not post your finished product below? I'd be interested to see what you come up with!
-
 iFallOffStuff got a reaction from Yoshifan33 in How to make face rigs ( for beginners)
I have recently become interested in face rigs, and , although I 'm not very experienced I feel like I haven't contributed an awful lot to the MI community. So here it is, face rigs for beginners! This tutorial is for those who are looking to use this guide to make their first face rig. Any questions you have comment below!
Step 1 : Finding The Right Tool
To make a face rig the first tool you need is a photo editing/paint tool. However, it can't be any paint tool... there is one requirement:
.It must save transparency, transparency allows you to load an file into MI (or any other programme for that matter) and have your chosen areas remain see through. This is essential.
Some tools you could use are:
Photoshop ( costs money, unless pirated)
Gimp ( Free and a generally useful tool)
Paint.net ( Another free and very useful tool)
Pixlr - ( Free , I have no experience with this tool , it was suggested by Tiedmes)
For this tutorial, I will be using paint.net.
Step 2: Editing the skin
Once you've got your paint tool open, you need the skin you want to edit (make sure, before you start editing, that you have a checkered grey and white background).
Select the eraser tool and edit out the eyes and the mouth, so that you can see the background through it. Once you're done , It should look like this (some people prefer a 2x2 eye size instead of the 1x2 eye size i'm using). Remember to save it! You'll need it again later!
Step 3: Loading it into MI
This is a simple step, it starts getting a bit more complicated in the next step.
.To load your rig into MI, simply spawn in a Steve ( or Alex ) into your project. Then, on the far right hand side of your mine - imator interface, you will see project properties. Click this and then click libary. Here you will see all the items in your project. Find the Steve you just spawned in and click on it, you should see a skin tab slightly below it.
. Click this, then change the skin to the file that you just edited ( the one where you erased the eyes and the mouth). You should now have a weird looking character.. something like this :
Step 4: Building
Ok, this is where it gets a bit harder... but if you follow these steps it should be easy.
You need to decide what part of the face you will edit first, I'm going to edit the eyes ; the simpler component.
The eyes contain 3 items :
.the eye whites
.the pupils
. the eyebrows
. The obvious part to start with is the eye whites, for this, I just use a cube. Load one in from the crafting table and parent it to the head. If you like a neat timeline, you might want to create a folder called something like "Rig Parts." Scale the cube down so that it covers both the eye sockets.
. Next, we'll do the pupils, like the eye whites, we'll be using a cube. Load it in, parent it like you did with the eye whites and scale it down. This time you may want to adjust it's depth as well. Once you've done one pupil you can easily duplicate it and move it other to the next eye. Great! We're almost done with the eyes.
Final part, the eyebrows! These are as simple as the eyes, and the exact same process. Eyebrows are usually about the same length as the eye sockets, you may want to take this into consideration. Like you did before, spawn in a cube and scale it down so that it is a thin rectangular shape. You may wish to angle it upwards slightly. Again, we can duplicate the one eyebrow to make two. This time however, you will need to change the rotation slightly.
And that's it! You should now have a face rig complete with move-able pupils , eyebrows and I guess.. if for whatever reason you need to move them, eye whites. .
Step 4.5: The Mouth
The mouth is ( in my opinion ) the key part to any facial rig, not only can a good mouth rig indicate who's speaking, it can also show expressions. In my mouth rig I will be having 5 components, although, after the end of this tutorial you should hopefully be able to add more so that the mouth suits your needs. My components are:
.Mouthbox
.Teeth (Lower and Upper)
.Mouth top
.Mouth Bottom
.Mouth sides (left and right)
To start the mouth rig we're going to need to go back into the editing tool you used originally and open the skin with the mouth and eyes edited out. We will have to make the areas around the mouth the same colour, so that when we build the mouth itself, we can have it blend in naturally. So pick a colour (similar to the rest of the face) and basically.. give him a beard. Just paint all around his mouth. Notice this in the picture (you may want to also make a note of the hex code so you can match the tone exactly in MI).
One you've done that, simply do as you did at the start of the tutorial. Go to libary > human > and change the skin to the file you just made.
Step 5 : Building the Mouth
To build the mouth I usually start with the lower and upper mouth. These are simply to rectangles the user can use to open and close the mouth. The size doesn't matter too much, as you can always resize it to your specific needs. The only scale value that really matters is the x, the other can be rough guesses as to how you will need it. Now, spawn in a rectangle and scale it so that it is almost the same length as the head and height value (Y or Z ) Covers about 1/8 of the mouth. Once it's been scaled match the tone of the cube, to the rest of the mouth. Next, copy it and mouth it upwards, out of sight, to form the upper mouth.
Next, I will create the mouth box?? ( The red part you see when you open your mouth). This is pretty simple : a red cube that goes inside his head to form the back of the mouth. Once you have done this step, you should no longer be able to see the background through his mouth. Most mouth insides tend to be a dark red.
Great! The mouth is really beginning to take shape, the obvious place to go from here is the teeth. So that's what I'll make next. The lower and upper teeth are usually seperate, this gives the animator more freedom when he or she is using your rig. The teeth are simply two rectangles that are tall enough so that they can meet in the middle and long enough so that they can cover the whole length of the mouth. After doing one row of teeth, you can duplicate it to make the other row. Almost done! Just one more step! The mouth looks quite square in the pictures, I'm going to show you how to fix that.
The last step is making the mouth sides, these are two skin coloured rectangles that allow your character to expand and compress his mouth. Sadly, though, it's not quite that simple. I make my sides so that the character can smile easily. To do this, I rotate the rectangle at 45 degrees and re - scale it. This can get a tiny bit hard but after this... you're done! I find it easier to spawn in another cube and parent the two together. This forms a nice diagonal line. The last step is to duplicate the rectangle and simply rotate it so that it is symmetrical on both sides. Then you're done! You're face rig will most likely look a lot better than mine as I need to go for dinner now... so I kinda rushed the end. Here's the finished product :
Also, this is my first MI tutorial so please take the time to fill out the poll and comment any advice you have! Hope you enjoyed!
If you did find this helpful , why not post your finished product below? I'd be interested to see what you come up with!
-
 iFallOffStuff got a reaction from ZephyrAnimations in How to make face rigs ( for beginners)
I have recently become interested in face rigs, and , although I 'm not very experienced I feel like I haven't contributed an awful lot to the MI community. So here it is, face rigs for beginners! This tutorial is for those who are looking to use this guide to make their first face rig. Any questions you have comment below!
Step 1 : Finding The Right Tool
To make a face rig the first tool you need is a photo editing/paint tool. However, it can't be any paint tool... there is one requirement:
.It must save transparency, transparency allows you to load an file into MI (or any other programme for that matter) and have your chosen areas remain see through. This is essential.
Some tools you could use are:
Photoshop ( costs money, unless pirated)
Gimp ( Free and a generally useful tool)
Paint.net ( Another free and very useful tool)
Pixlr - ( Free , I have no experience with this tool , it was suggested by Tiedmes)
For this tutorial, I will be using paint.net.
Step 2: Editing the skin
Once you've got your paint tool open, you need the skin you want to edit (make sure, before you start editing, that you have a checkered grey and white background).
Select the eraser tool and edit out the eyes and the mouth, so that you can see the background through it. Once you're done , It should look like this (some people prefer a 2x2 eye size instead of the 1x2 eye size i'm using). Remember to save it! You'll need it again later!
Step 3: Loading it into MI
This is a simple step, it starts getting a bit more complicated in the next step.
.To load your rig into MI, simply spawn in a Steve ( or Alex ) into your project. Then, on the far right hand side of your mine - imator interface, you will see project properties. Click this and then click libary. Here you will see all the items in your project. Find the Steve you just spawned in and click on it, you should see a skin tab slightly below it.
. Click this, then change the skin to the file that you just edited ( the one where you erased the eyes and the mouth). You should now have a weird looking character.. something like this :
Step 4: Building
Ok, this is where it gets a bit harder... but if you follow these steps it should be easy.
You need to decide what part of the face you will edit first, I'm going to edit the eyes ; the simpler component.
The eyes contain 3 items :
.the eye whites
.the pupils
. the eyebrows
. The obvious part to start with is the eye whites, for this, I just use a cube. Load one in from the crafting table and parent it to the head. If you like a neat timeline, you might want to create a folder called something like "Rig Parts." Scale the cube down so that it covers both the eye sockets.
. Next, we'll do the pupils, like the eye whites, we'll be using a cube. Load it in, parent it like you did with the eye whites and scale it down. This time you may want to adjust it's depth as well. Once you've done one pupil you can easily duplicate it and move it other to the next eye. Great! We're almost done with the eyes.
Final part, the eyebrows! These are as simple as the eyes, and the exact same process. Eyebrows are usually about the same length as the eye sockets, you may want to take this into consideration. Like you did before, spawn in a cube and scale it down so that it is a thin rectangular shape. You may wish to angle it upwards slightly. Again, we can duplicate the one eyebrow to make two. This time however, you will need to change the rotation slightly.
And that's it! You should now have a face rig complete with move-able pupils , eyebrows and I guess.. if for whatever reason you need to move them, eye whites. .
Step 4.5: The Mouth
The mouth is ( in my opinion ) the key part to any facial rig, not only can a good mouth rig indicate who's speaking, it can also show expressions. In my mouth rig I will be having 5 components, although, after the end of this tutorial you should hopefully be able to add more so that the mouth suits your needs. My components are:
.Mouthbox
.Teeth (Lower and Upper)
.Mouth top
.Mouth Bottom
.Mouth sides (left and right)
To start the mouth rig we're going to need to go back into the editing tool you used originally and open the skin with the mouth and eyes edited out. We will have to make the areas around the mouth the same colour, so that when we build the mouth itself, we can have it blend in naturally. So pick a colour (similar to the rest of the face) and basically.. give him a beard. Just paint all around his mouth. Notice this in the picture (you may want to also make a note of the hex code so you can match the tone exactly in MI).
One you've done that, simply do as you did at the start of the tutorial. Go to libary > human > and change the skin to the file you just made.
Step 5 : Building the Mouth
To build the mouth I usually start with the lower and upper mouth. These are simply to rectangles the user can use to open and close the mouth. The size doesn't matter too much, as you can always resize it to your specific needs. The only scale value that really matters is the x, the other can be rough guesses as to how you will need it. Now, spawn in a rectangle and scale it so that it is almost the same length as the head and height value (Y or Z ) Covers about 1/8 of the mouth. Once it's been scaled match the tone of the cube, to the rest of the mouth. Next, copy it and mouth it upwards, out of sight, to form the upper mouth.
Next, I will create the mouth box?? ( The red part you see when you open your mouth). This is pretty simple : a red cube that goes inside his head to form the back of the mouth. Once you have done this step, you should no longer be able to see the background through his mouth. Most mouth insides tend to be a dark red.
Great! The mouth is really beginning to take shape, the obvious place to go from here is the teeth. So that's what I'll make next. The lower and upper teeth are usually seperate, this gives the animator more freedom when he or she is using your rig. The teeth are simply two rectangles that are tall enough so that they can meet in the middle and long enough so that they can cover the whole length of the mouth. After doing one row of teeth, you can duplicate it to make the other row. Almost done! Just one more step! The mouth looks quite square in the pictures, I'm going to show you how to fix that.
The last step is making the mouth sides, these are two skin coloured rectangles that allow your character to expand and compress his mouth. Sadly, though, it's not quite that simple. I make my sides so that the character can smile easily. To do this, I rotate the rectangle at 45 degrees and re - scale it. This can get a tiny bit hard but after this... you're done! I find it easier to spawn in another cube and parent the two together. This forms a nice diagonal line. The last step is to duplicate the rectangle and simply rotate it so that it is symmetrical on both sides. Then you're done! You're face rig will most likely look a lot better than mine as I need to go for dinner now... so I kinda rushed the end. Here's the finished product :
Also, this is my first MI tutorial so please take the time to fill out the poll and comment any advice you have! Hope you enjoyed!
If you did find this helpful , why not post your finished product below? I'd be interested to see what you come up with!
-
Recently Browsing 0 members
No registered users viewing this page.