

Everything posted by ImmersiveGaming
-
You can use the h264 codec to compress to .avi. It's the codec I use and the quality is 10x times better than any of the others and the file size is half that of windows encoder. Here are the settings I use to make it work without losing frames at the end: And to get it to work, try installing it from here: http://www.videolan.org/developers/x264.html or install the k-lite codec pack: http://www.codecguide.com/download_kl.htm
-
Displacement Mapping Test
ImmersiveGaming replied to ImmersiveGaming's topic in Random/Test animations
I haven't tried Blender yet but plan to. Making the maps doesn't seem too difficult using the Photoshop plugin to generate them. I'm sure there's more to it beyond that though. I wish we could use them in Mine-imator. One idea I had to at least add displacement and a feeling of 3d to a mine-imator animation is to map each frame and offset it frame by frame since we can output the animation as a .png sequence. But that would be excruciatingly time consuming and the backgrounds would all have to be green screened. I've got a feeling the results would be pretty cool though.- 5 replies
-
- 1
-

-
- bump mapping
- displacement mapping
- (and 1 more)
-
Displacement Mapping Test
ImmersiveGaming replied to ImmersiveGaming's topic in Random/Test animations
Thanks -
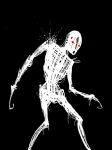
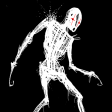
I saw some really nice videos of some of the things people can do in Adobe After Effects. I know a lot of people on here get a little irritated when someone enhances an animation with post-processing effects, but I am a fan of seeing those kinds of animations and think it really doubles their value. I'm more inclined to watch those types than those that haven't had any effects added. Anyway, I am trying to learn bump mapping and displacement mapping which gives a still 2d image a 3d look. Not entirely sure how to make textures yet based on this tech, if that is even possible (would be great if it is), so I just stuck with a basic displacement map on a still image for my first try. It's just a simple splash screen and not that great, but I decided to share it to maybe get some tips. I used this rig for this video: http://www.mineimatorforums.com/index.php?/topic/44839-igman-character-rig-beta-10/
-
No worse than the fad bear fetish.. And bendable limbs are important for animating. The textures aren't that big of a deal to me, but I do love me some HD textures.
-
I don't know what phantom Mike is sorry. Thanks for the comment censored even the names. Hilarious.
-
Looking ok. Suggestion for the fingers update if you don't mind some constructive criticism and maybe I'm alone on this, but I like fingers with all 3 knuckles for all 3 bends, rather than the two knuckles, two bend versions I've seen.
-
Thanks for the comments. Glad people are liking it (except for the freaking eyebrows ) And yeah, ImmersiveGaming = IG
-
This is my very first human character rig, my second rig in general. This is much better and more thought out than my werewolf rig and I am happy to share it with others. This is a beta version of the rig. I still have a lot to do to it, but as it is, it looks nice and is functional. Future release will include: - A more functional mouth - More detailed textures (i.e. hat design, pockets on the jeans, etc) - Multiple Texture Packs - Editable texture sheets for each object As it stands, I reused texture sheets for duplicate items. This is fine if you like symmetrical designs. I created an instance of each and every object however, so there is no item with a use count more than 1. The reason for this is because I want to do asymmetrical texturing on the character. You can use this rig in any way you wish, but if you don't retexture it, you must give me credit for it. If you use it with custom textures, credit isn't necessary but is appreciated. You cannot upload this rig to any other website without my permission. You can, however, post the download link anywhere you like. The textures are 1024x1024, so expect a few minutes for it to load into Mine-imator, especially on a lower end machine. If you have any questions, helpful criticisms, hateful comments, or whatever, feel free to post them here or message me. DOWNLOAD Screenshots: Short animation using this rig (sorry about the silence. I got lazy) Side note: I am currently working on an HD 10 zombie rig pack, all with custom textures, so keep an eye out for that.
-
Really Awesome
- 13 replies
-
- 1
-
-
- chappie inspired
- scout #22
- (and 2 more)
-
cool
-
Oh there is a grid snap option. That isn't really what I mean, but that could work I guess.
-
Lossless codecs are good. I like H.264/MPEG-4 AVC which has a lossless option. Pretty good animation. Some music would help a lot.
-
A grid snapping option is a little different would be a good idea too.
-
I was just thinking yesterday that there should be a gear rig..
- 8 replies
-
- 1
-
-
- castedshadow98
- objects pack
- (and 1 more)
-
Not sure how useful this would be, but I have found times where it would be. What I suggest is alignments for objects to simplify moving them into place. I'm not sure how viable this would be in a 3d workspace though. If anyone uses Photoshop or Illustrator or probably most higher end art programs, you are probably familiar with alignment options. Example of Photoshop options: I thought something like this might be useful for putting objects into place rather than eyeballing it or doing the math to center things. I know I may be a little "OCD" about having things perfectly centered and stuff though and this option may not be as useful as it is in my head. But I think it would make placing objects a bit quicker and easier. Here is an example for Mine-imator. Let's say I am making some teeth to go in my characters mouth. I parent the teeth to the head and then want to move them into place. Instead of having to judge the center with my eyes or taking the time to move it into place, I click "Front Face Align Center", which would align the center point of the teeth to the center point of the front face of the head object. So now all I would have to do is move the teeth down and back a bit and have them perfectly centered to the face. Here is another example. I'll call it "Front Face Top Align". This will align the center point of the teeth to the top center part of the front face of the head cube. There could be right face alignments, back face alignments, top face alignments, etc. I would personally really love this feature, but not sure how useful it might be to others.
-
Shadow, Blending, and Sound test
ImmersiveGaming replied to ImmersiveGaming's topic in Random/Test animations
It's a pretty dark scene. Helps to have a calibrated monitor in a dark room. That's how I work, so I forget to compensate for people who may not be watching it in the same way. I used one dynamic light in the hallway. By dynamic, I mean I faded it in and out and moved it around depending on where the light source was in teach of the rooms. You can see that in the first room at the start, the light only hits the right side of his face and fades rather quickly. In the next room, it is centered. And in the last room, you can see it is coming from the right of him again. When the screen switches to him sliding in, there is a new light source and some blending and a shadow for more realism. I actually have added a dynamic shadow under him in the hallway and it really helped to tie it together. I just haven't uploaded it yet. -
That would be great Let me know if it works well. It's a bit rough around the edges so I'm a little nervous about it.
-
Support for Higher Definition Textures
ImmersiveGaming replied to ImmersiveGaming's topic in Suggestions
I got a 512x512 and a 1024x1024 to wrap correctly. Not sure why they all of a sudden decided to work. This should probably be moved to bug report section. I wish I knew how to replicate it, but it seems completely random. -
Support for Higher Definition Textures
ImmersiveGaming replied to ImmersiveGaming's topic in Suggestions
Skins is what I meant. I couldn't get one to wrap at 1024x1024, but it fixed itself somehow and wraps how it should now. -
Support for Higher Definition Textures
ImmersiveGaming replied to ImmersiveGaming's topic in Suggestions
Something must have bugged out. Restarted Mine-imator and it's accepting the larger textures now.. Weird. -
Support for Higher Definition Textures
ImmersiveGaming replied to ImmersiveGaming's topic in Suggestions
When using a character template that is greater than 256x256, the texture doesn't wrap right to the character in mine-imator. When using custom shapes, I can use higher def textures, but not when adding a character texture sheet for a model. For instance, I can double the character texture template to 512x512 and it will not wrap right on the model. Mine-imator 1.0.0 demo 5. -
I was doing some testing while working on a texture for a rig and realized that the character texture for a human, and all others I'm guessing, doesn't support a texture sheet greater than 256x256. It would be great to be able to go higher than this and create textures with extreme detail.
-
Handles fairly well. A bit sketchy at times, but I took my time building it and made sure it was functional. I'm going to try it in an animation soon to see for sure.
-
This is my completed werewolf rig. It's my very first, so don't be too critical. It should be fairly user friendly. I haven't tried it in an animation yet though, so we'll see. At the very least, it's a cool prop. The skin is a bit bland and I plan on updating it by adding more detail, more variation in color, etc. I'll upload the new textures as soon as I finish them. If anyone is interested in using it, click the download link below. You don't have to credit if you do happen to use it, but it would be appreciated. You can't re-upload this rig anywhere else without my permission. Download: http://adf.ly/1ORyEh If you have any questions, put them here in this thread and I will answer them. Like I said, I haven't tested it in an animation yet. Screenshots:
-
Recently Browsing 0 members
No registered users viewing this page.