
Everything posted by tutibrave
-
hairy arms
-
A polygon editor can make models much more efficient in shape count. It can allow users to create custom shapes without the need of multiple.
-
right there
-

How to import a Rig in mine imator
tutibrave replied to RayanTheMinecraftgamer192's topic in Tutorials, tips and tricks
oh hey -
Jesse, we need to cook.
-
When Time decays.. | Fox Miner Family
tutibrave replied to SpideySpidery's topic in Wallpapers and art
I am Heavy Weapons Guy...and this is my weapon. She weighs one hundred fifty kilograms and fires two hundred dollar, custom-tooled cartridges at ten thousand rounds per minute. It costs four hundred thousand dollars to fire this weapon...for twelve seconds. -
HAPPI BIWWWTHDAY REDDY (Fox Miner) ♥️♥️♥️ !!!!!!!!
tutibrave replied to CanIIA's topic in Narrative animations
H A P I B I R D A Y -
It's him again.
-
gordon freeman
-
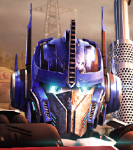
Directed by Michael Bay
-
Five Nights In Anime 3D 1 Rigs (Fnia 3D 1 Rigs)
tutibrave replied to Gsuyu Altolf Mouse's topic in Rigs
NO. -
you turned him into a monster you gave him Jay's body
-
it starts with one
-
tutibrave: Now that we've separated from each other, we shall combine, as a more powerful being.
*the family combines*
tutibrave: Vengeance is mine, @SpideySpidery.
TO BE CONTINUED...
ON THE FOX MINER FAMILY BOOK: VENGEANCE -
please have a Mac port
-
She's an anime character. Also, loom speaker.
-
The Family Monster (3K Rez) [Fox Miner Family Skin 0.1]
tutibrave replied to Fox Miner's topic in Wallpapers and art
Not my fault it was trying to kill us. -
The Left Overs |The Family Monster 2.0
tutibrave replied to ek_animator's topic in Wallpapers and art
oh yeah -
The Left Overs |The Family Monster 2.0
tutibrave replied to ek_animator's topic in Wallpapers and art
where am i -
The Family Monster (3K Rez) [Fox Miner Family Skin 0.1]
tutibrave replied to Fox Miner's topic in Wallpapers and art
I drank the monster's blood. I killed it. -
The Family Monster (3K Rez) [Fox Miner Family Skin 0.1]
tutibrave replied to Fox Miner's topic in Wallpapers and art
I just drank blood. Tasted pretty good.


-
Recently Browsing 0 members
No registered users viewing this page.