Leaderboard
Popular Content
Showing content with the highest reputation on 02/11/21 in all areas
-
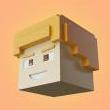
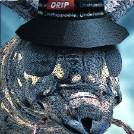
Forbidden portal
AshFox and 5 others reacted to DragonPixel for a topic
Forbidden Portal A wallpaper yay made this a few weeks ago, not the best it could be but it was good practice in the end. Not really much to say about it, just wanted to try out some lighting tricks and this was the end result. let me know what you think, as always feedback is more appreciated.6 points -
Little scenario
KevThePurpleFox and 3 others reacted to FoxyThePirate2704 for a topic
Meh, i was bored and i make this little scenario PD: Accidentally i used medium buffer for the sun instead of very high4 points -

Mine-Imator Tutorial - A Quick And Easy Way To Get Reflective Water
Nothing2007 and 3 others reacted to Keep on Chucking for a topic
What's up dudes! In this tutorial I'm showing off a quick and easy way to get reflective water for your Mine-Imator Creations!4 points -

Here's a traffic light model I made
BloxTheRigger and 3 others reacted to Frost for a status update
Here's a traffic light model I made4 points -

Warlord Weapon Rig Pack v1 (discontinued)
F animation reacted to The Evil Commander for a topic
oh yeah , This my warlord weapon rig Made From Modelbench but not all weapon only a few discontinued for no reason Download Here LINK Download (Fixed)1 point -
Blender like face rig
master attack reacted to Jnick for a topic
Ok so me and @Frost have made a face rig fully in mb that possible to pose multi ways.Its heavily based off blender/maya user mouth rigs.We also did not use alpha glitch for this as doing lighting breaks alpha face rigs or at least the ones we use(hozq's face rig). Pls don't ask for it this is for only my team and personal use only1 point -

5 Tips to improve outdoor lighting in Mine-Imator!
FoxyThePirate2704 reacted to ItsBluefindude for a topic
Greetings, animators! So today I will be giving you some tips to improve lighting in Mine-Imator. 1. Use a custom background sky texture, I suggest use an inverted sphere as you can have more control over the texture of the background texture. 2. Scale your scenery up! This will make the lighting and shadows better. I usually use scale 3 but you can use any scale. 3. If you are doing a night time render, then don't rotate the time to night, change the ambient color to blue and change the sunlight color to a lighter blue color than ambient color and use a custom night sky texture, also don't forget to scale. 4. Don't overuse saturation, i'd say try to use vibrance in camera settings until you feel like its not saturated much. 5. If you are making a sunset render, use a sunset sky texture, change the ambient to blue, sunlight to orange and mess with the camera settings to get better results. Bonus tips. 6. In the camera settings, put the brightness to 50 and contrast to 100, now make everything at the background darker or brighter and import a point light making it night time, and the point light will be very bright. This is useful cause Mine-Imator's lighting sources don't get that bright. 7. Camera settings, play around with the camera settings to eventually get better results. I hope this was helpful to you all, let me know in the comments if you have any questions and i may answer to that. Peace!1 point -

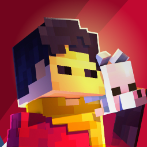
I made a Super Smash Bros Render!
insanehelix7076 reacted to CandyCat449 for a topic
So I made a Render that has his skin in it And it is Super Smash Bros themed! Want to make 2 more but I need some help Check out this link for the post So here is the render! I had to use some photo editing so sorry if the characters look squished1 point -
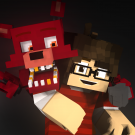
FTP | FNAF Freddy faz bear Rig
insanehelix7076 reacted to FOXY TOONS for a topic
1 point -

Mine-Imator Tutorial - A Quick And Easy Way To Get Reflective Water
Keep on Chucking reacted to LacaMenDRY for a topic
I don't Realize that We can Inverted The Scale Value. If I Know this Value Can be Inverted,I"ll Now thia tipa a long long long time ago. But Hey. Thanks KeepOnChucking!1 point -

Mine-Imator Tutorial - A Quick And Easy Way To Get Reflective Water
Keep on Chucking reacted to insanehelix7076 for a topic
The final render looked like the place where i spawned in Minecraft for the first time. i had shaders on1 point -
Mine-Imator Tutorial - A Quick And Easy Way To Get Reflective Water
Keep on Chucking reacted to Draco63 for a topic
I've only just looked at your YT channel and realized how amazing your tutorials are. Keep up the good work!1 point -
.thumb.png.27cd7ed4cc7ddd9abd226250d1279255.png)
THE WITCH HOUSE
MetherThelord reacted to TwoToRule for a topic
I suggest posting all of these wallpapers in one post if you are going to post them all rapidly. Otherwise, the New Posts section will be full of just your posts.1 point -

I made a Super Smash Bros Render!
justin_ reacted to Mr M3m3~Chan for a topic
Something here is off... but I don't what it is1 point -
Having Trouble Importing Projects (I'm a newbie)
Riftjaw reacted to insanehelix7076 for a topic
Don't be harsh on yourself.. it gets kinda old pretty fast when you act like a life coach or at least in a way. if you think your dumb, just let that thought go, your respected like everybody else, your smart and i know it.1 point -
Need a female version of my skin
FOXY TOONS reacted to LacaMenDRY for a topic
There You Go Man. Owh better yet maybe she's name is Tutibra. And here is the Skinn... And yeah the Skin have a little bit problem tho,so you can Re Edit it. And all of the skin I already Re Modified into Realistic version with Gradient features. Special just for you man. This is my reward for ya that already following me. And Don't worry It's Free.... Hope you like it,And Enjoy The SKINS!!1 point -
I suggest using MI not MB for doing your renders since MB is not really made for that1 point
-
So there is this minecraft mod called the Blockbuster mod, and in it you can act out scenes and record them afterwords. I was wondering if there could be some way to "act" in Mine-imator. I believe it would be helpful for making natural looking movement easier and faster; though it would require some sort of collision. For example: I want someone to walk down a path and into a cave. I could click on the person and have an option to "Act." When acting, I could control the person as if I was in Minecraft and my movement would create key-frames. I could walk down the path and into the cave until I clicked "Stop Acting." SHIFT would make slow movement and CTRL would make quick movement or running. I don't know what would happen if there are key-frames already in the timeline ahead of the act. Collision with objects could be an option one enables in objects you create. The "import terrain from Minecraft world" could automatically have collision turned on when created. If two objects have collision turned on, then they should have the inability to pass through eachother when they touch. Collision could also be turned on and off for different parts of the animation. If collision isn't possible, then acting will have to work differently. The person could be pulled down unless terrain or a block is below it (then it will stop) and temporarily pulled up when SPACE BAR is pressed. I don't know if terrain has the dynamics for that, but maybe it could be added?1 point
-

How to make face rigs ( for beginners)
FoxyThePirate2704 reacted to iFallOffStuff for a topic
I have recently become interested in face rigs, and , although I 'm not very experienced I feel like I haven't contributed an awful lot to the MI community. So here it is, face rigs for beginners! This tutorial is for those who are looking to use this guide to make their first face rig. Any questions you have comment below! Step 1 : Finding The Right Tool To make a face rig the first tool you need is a photo editing/paint tool. However, it can't be any paint tool... there is one requirement: .It must save transparency, transparency allows you to load an file into MI (or any other programme for that matter) and have your chosen areas remain see through. This is essential. Some tools you could use are: Photoshop ( costs money, unless pirated) Gimp ( Free and a generally useful tool) Paint.net ( Another free and very useful tool) Pixlr - ( Free , I have no experience with this tool , it was suggested by Tiedmes) For this tutorial, I will be using paint.net. Step 2: Editing the skin Once you've got your paint tool open, you need the skin you want to edit (make sure, before you start editing, that you have a checkered grey and white background). Select the eraser tool and edit out the eyes and the mouth, so that you can see the background through it. Once you're done , It should look like this (some people prefer a 2x2 eye size instead of the 1x2 eye size i'm using). Remember to save it! You'll need it again later! Step 3: Loading it into MI This is a simple step, it starts getting a bit more complicated in the next step. .To load your rig into MI, simply spawn in a Steve ( or Alex ) into your project. Then, on the far right hand side of your mine - imator interface, you will see project properties. Click this and then click libary. Here you will see all the items in your project. Find the Steve you just spawned in and click on it, you should see a skin tab slightly below it. . Click this, then change the skin to the file that you just edited ( the one where you erased the eyes and the mouth). You should now have a weird looking character.. something like this : Step 4: Building Ok, this is where it gets a bit harder... but if you follow these steps it should be easy. You need to decide what part of the face you will edit first, I'm going to edit the eyes ; the simpler component. The eyes contain 3 items : .the eye whites .the pupils . the eyebrows . The obvious part to start with is the eye whites, for this, I just use a cube. Load one in from the crafting table and parent it to the head. If you like a neat timeline, you might want to create a folder called something like "Rig Parts." Scale the cube down so that it covers both the eye sockets. . Next, we'll do the pupils, like the eye whites, we'll be using a cube. Load it in, parent it like you did with the eye whites and scale it down. This time you may want to adjust it's depth as well. Once you've done one pupil you can easily duplicate it and move it other to the next eye. Great! We're almost done with the eyes. Final part, the eyebrows! These are as simple as the eyes, and the exact same process. Eyebrows are usually about the same length as the eye sockets, you may want to take this into consideration. Like you did before, spawn in a cube and scale it down so that it is a thin rectangular shape. You may wish to angle it upwards slightly. Again, we can duplicate the one eyebrow to make two. This time however, you will need to change the rotation slightly. And that's it! You should now have a face rig complete with move-able pupils , eyebrows and I guess.. if for whatever reason you need to move them, eye whites. . Step 4.5: The Mouth The mouth is ( in my opinion ) the key part to any facial rig, not only can a good mouth rig indicate who's speaking, it can also show expressions. In my mouth rig I will be having 5 components, although, after the end of this tutorial you should hopefully be able to add more so that the mouth suits your needs. My components are: .Mouthbox .Teeth (Lower and Upper) .Mouth top .Mouth Bottom .Mouth sides (left and right) To start the mouth rig we're going to need to go back into the editing tool you used originally and open the skin with the mouth and eyes edited out. We will have to make the areas around the mouth the same colour, so that when we build the mouth itself, we can have it blend in naturally. So pick a colour (similar to the rest of the face) and basically.. give him a beard. Just paint all around his mouth. Notice this in the picture (you may want to also make a note of the hex code so you can match the tone exactly in MI). One you've done that, simply do as you did at the start of the tutorial. Go to libary > human > and change the skin to the file you just made. Step 5 : Building the Mouth To build the mouth I usually start with the lower and upper mouth. These are simply to rectangles the user can use to open and close the mouth. The size doesn't matter too much, as you can always resize it to your specific needs. The only scale value that really matters is the x, the other can be rough guesses as to how you will need it. Now, spawn in a rectangle and scale it so that it is almost the same length as the head and height value (Y or Z ) Covers about 1/8 of the mouth. Once it's been scaled match the tone of the cube, to the rest of the mouth. Next, copy it and mouth it upwards, out of sight, to form the upper mouth. Next, I will create the mouth box?? ( The red part you see when you open your mouth). This is pretty simple : a red cube that goes inside his head to form the back of the mouth. Once you have done this step, you should no longer be able to see the background through his mouth. Most mouth insides tend to be a dark red. Great! The mouth is really beginning to take shape, the obvious place to go from here is the teeth. So that's what I'll make next. The lower and upper teeth are usually seperate, this gives the animator more freedom when he or she is using your rig. The teeth are simply two rectangles that are tall enough so that they can meet in the middle and long enough so that they can cover the whole length of the mouth. After doing one row of teeth, you can duplicate it to make the other row. Almost done! Just one more step! The mouth looks quite square in the pictures, I'm going to show you how to fix that. The last step is making the mouth sides, these are two skin coloured rectangles that allow your character to expand and compress his mouth. Sadly, though, it's not quite that simple. I make my sides so that the character can smile easily. To do this, I rotate the rectangle at 45 degrees and re - scale it. This can get a tiny bit hard but after this... you're done! I find it easier to spawn in another cube and parent the two together. This forms a nice diagonal line. The last step is to duplicate the rectangle and simply rotate it so that it is symmetrical on both sides. Then you're done! You're face rig will most likely look a lot better than mine as I need to go for dinner now... so I kinda rushed the end. Here's the finished product : Also, this is my first MI tutorial so please take the time to fill out the poll and comment any advice you have! Hope you enjoyed! If you did find this helpful , why not post your finished product below? I'd be interested to see what you come up with!1 point -

How Do I Use Model Bench?
JB Animations reacted to Ethaniel for a topic
Step 1: Download Model Bench Step: 2: Press buttons until you figure it out.1 point -
EDIT: If there are a lot of you who do really want to use this, but find it to hard, do ask me. I will try to find time to make it more user friendly! Hi guys! XCT here! I haven't been able to post anything for a while and won't be able to in the upcoming time either. I have been working very hard on building this castle to make some animations, but I simply can't find the time right now. That's why I decided to give you guys the download. It's the link to the save file of the building, meaning you cannot import it just like that. It's not finished and not prepared for you on a silver plate, but for those determined to use it, I'm sure you'll find your way! Maybe ask some of the experienced guys to help you out, there are a lot of awesome animators around here! (Also I'm resetting my PC and I wouldn't want to throw away all that work ;-; ) If you need any help or have any questions you can contact me on my private mail: remimateboer@live.nl since I only rarely check in on the forum nowadays. (Spam=Instantblock). Or just comment/PM me on the forum as I will be checking in the first couple of days to see if you need any help and if I can be of use! I've always loved Minecraft and MineImator so I hope I'll find the time in the future to come back here! But for now, I hope my builds can be of use to you all who are still actively trying to improve! (Note that in the file you will also find textures for skins/rigs, you only need the texture that says JOHNSMITH if you want to use the texture that I made compatible for MI on the buildings ) Even though I'm not active anymore at the moment, a like, comment or link if you used it is always appreciated! I'd love to hear what you guys think of my work and even rather see how you use it in your own projects! Hopefully the oldgolds can help out the newer animators with this! Cheers! Goodluck to all of you! Here's the link to the file: http://www.mediafire.com/download/typyfb8wkcbdw3n/WULVENHEIMCASTLE.rar Here some picture for what it all looks like (Cause no pics no clicks! ):1 point